Technical Skills
3DCTM 1 - Understand the basic components of a 3D Model.
3DCTM 2 - Understand the function of different types of textures.
3DCTM 3 - Know how to use a 3D Modelling package.
3DCTM 4 - Understand the benefit of good workflows and efficient techniques for creating 3D models.
3DCTM 5 - Understand smoothing/subdivision and texture baking.
3DCTM 6 - Understand the concept of high to low polygon workflow.
3DCTM 7 - Be able to technically and creatively problem solve in 3D.
3DCTM 8 - Be able to work within a brief to ensure models fit within a wider project.
High/Low Poly Sword
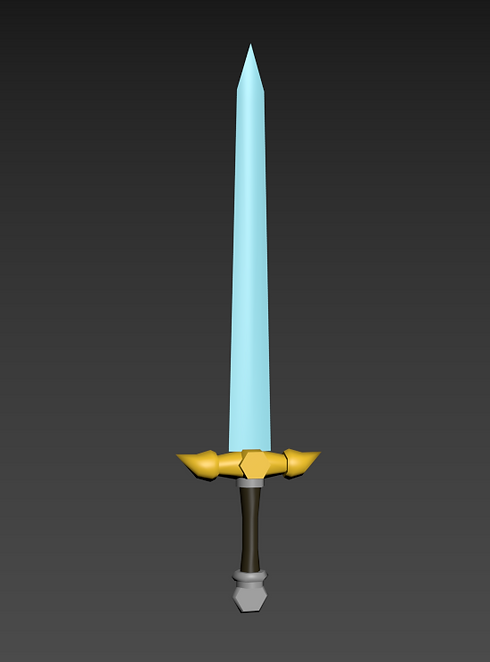
This was my first model in 3DS Max following a tutorial on YouTube. I used primitive shapes to block out the model and then used edit poly so I could edit the polygons and vertices as well as use modifiers. The model is low poly with not much detail but I am still happy with the result. I think the blade and horns for the handguard were the most difficult parts so I will still have to get used to 3DS Max. My next steps will be to unwrap the sword and apply textures.
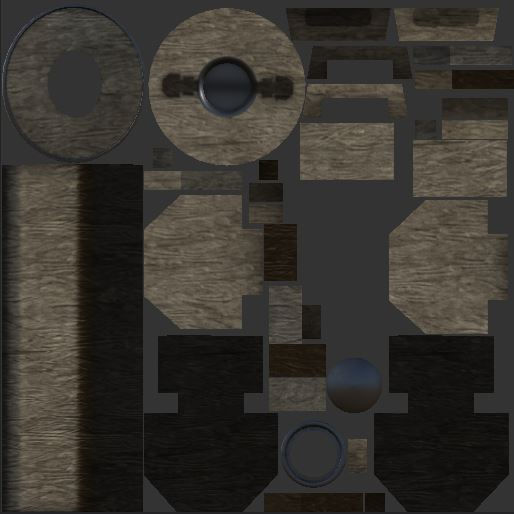
Following the tutorials I unwrapped the UVW for the sword and rendered a UV template by separating all the different elements of the model and organising them into groups. It was recommended that I switch my model over to one that had already been made by my teacher just so there were no problems and so the focus was on how to unwrap. This was my first time unwrapping a model and at first I found it quite complicated but I soon understood what was happening and why models need to be unwrapped. After that I learned how to make a colour map in photoshop to use for the texturing phase, as well as how to add materials to objects.
After modelling a low poly sword and unwrapping and rendering it was time to make a high poly version. I did this using the swift loop and turbo smooth tools in 3DS Max. I found this very difficult and required a lot of help as I struggled with getting the swift loops to go where I wanted and how many to use.


Reflection
If I was to do this again I would try to change the design of the low poly model to make it more personalised. I would have tried to make it more similar to the high poly version by creating an indent in the blade and connecting the handle better. This covers 3DCTM 1, 3, 4 and 8.
Stylized Chest
This is a stylized chest model I created following a tutorial series on YouTube. The creation of this helped me get a lot more familiar with 3DS Max and some of the different tools it can offer. Like the way the shape of the model turned out especially the sides that look like its actually made out of wood planks. Next I need to unwrap and texture the chest.
After unwrapping and rendering the UV template I went into photoshop to create the textures. This helped me understand the process of creating textures which I had not done before. I don't think the textures look bad but I they would have looked more realistic if I had just got them online as this doesn't look like something that would be put in a game today. Next time I will use textures already made and try to model something with even more detail.


Reflection
Overall I'm happy with the outcome of my chest model. The main feature that could use improving is the textures, but I'm still glad I was able to learn about creating textures in photoshop. Next time I think I will use a texturing software like Substance Painter to see the difference and which one I prefer. This model covers technical skills 1, 2, 3 and 4.
Viking Shield
This is a model I've been working on during spare time in games development lessons and in my own time that served as a refresher course for coming back after the Christmas break. I used online reference again for making the model and UVW unwrap and this was the first time I had textured since the Stylized Chest model, and my first time using Substance Painter. The unwrapping process went a lot better for me this time when I had something to follow. The main tools I learned about were quick peel and quick planar map which allowed me to lay the elements flat so I could adjust the size and rotation. I also used the pack custom tool which scales and fits all your pieces into the box which really helped, although I realise it might not work every time. For my next steps I still want to be able to unwrap a model without a tutorial so I can prove I know what I'm doing.


The tutorial I watched used Substance Painter to texture so this was my first time using it. I didn't find it too difficult although I didn't know why I was doing a lot of the things I was. However I think it looks a lot better than the textures I made for the stylized chest so I will most likely use this in the future. After adding in the wood texture from the video, it imported some textures that I didn't have so I ended up using Substance Share to download a new wood texture that I think looks a lot better and then added some decorations to it and as a final touch some blood to give it a battle worn theme. To improve I need to watch some videos explaining how to use the software and continue to make more models in order to texture them. This model covers technical skills 1, 2, 3, 4 and 5.

Viking Axe
This is a model I made for practice in my own time. Its very important I practice different models with different shapes so one day ill be able to model anything. I followed online guidance from the large amounts of material available on Google Classroom. I enjoyed making this model and the main tool I learned about was symmetry which id used before but it always caused me problems but this time I was able to use it multiple times in a row for the blades. The online materials only covered the model and although that was the area I wanted to practice I tried to unwrap and render a UV template.


Reflection
After trying to do the UVW unwrap for a while it didn't look right and without a guide to go off I didn't know how to improve it. I applied a texture pattern and it didn't look right at all so I decided to just leave it there. This was a good learning experience for me and if I was to do it again I would definitely do more research into UVW's and how to do it for any model. I would also try and add some different features so it isn't exactly the same as the tutorial. This model covered technical skills 1, 3, 7 and 8.
Wizard Staff


